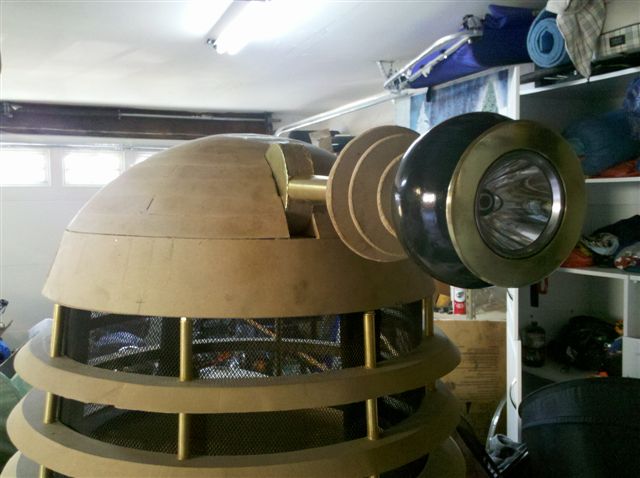
Last year we built a Dalek. His name is Fredalek, and he dressed up as Santa for Christmas.
Dalek building is surprisingly straightforward, thanks to the community at Project Dalek. Plans for all types of Daleks are on this site with accurate dimensions, compiled by properly obsessed British loonies.
The only part of Dalek building that filled me with trepidation was the dome. It is big and round and has flattened sides. Usually Dalek domes are made of fiberglass, which involves buying all the fiberglass materials and tools, then working a lot in a well ventilated area, and the making the thing no less than THREE times – first the plug, then the mold and then the dome. Once you have made one, it is possible to make more domes and trade them on the Dalek black market – but watch out for the BBC copyright police.
I have never done any work with fiberglass so I read up on it and started worrying a lot about how many weekends it would take, how much money it would cost and how much my good wife would complain about the smells. Then I read alansdalek’s STORM neck-ring construction method which uses conic sections made from thin Dalekanium (known to earthlings as Medium Density Fiberboard or MDF). Lightbulb Moment. Could I use this method for a dome? Some quick math suggested that if the conic sections were 1″ wide then the raised edges between them would be only a tenth of the thickness of the MDF. The ridges could be easily sanded without compromising strength. Nothing to lose in trying (ok, $12), so I gave it a shot one weekend and ended up with a dome which looks pretty good. With the lessons learned, I think a second attempt would be near perfect.
I took pictures along the way, for your edification.
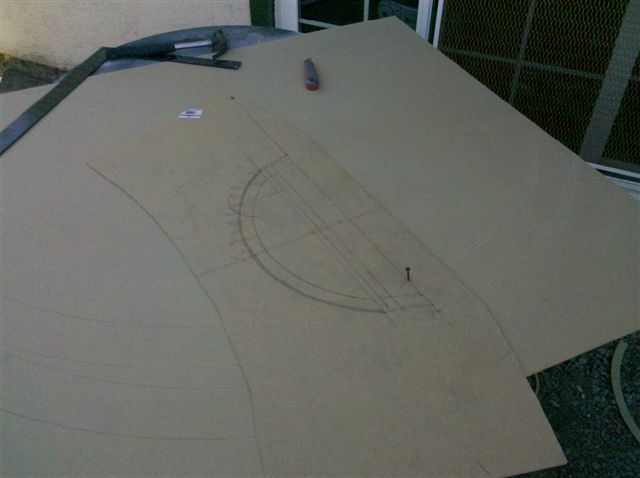
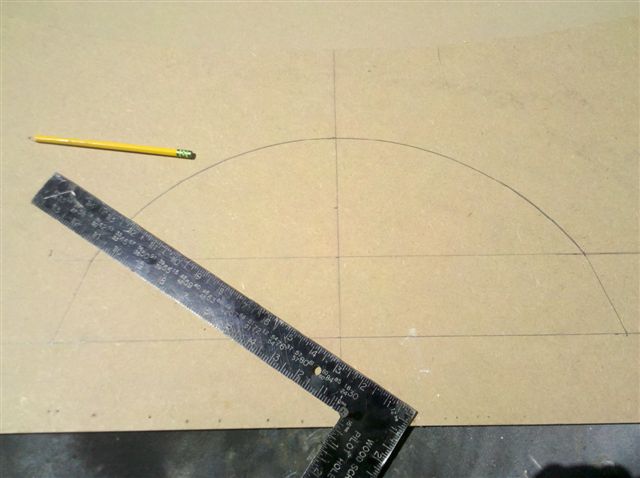 The first step was to map things out. I drew this on MDF as I thought I would cut it out as a template, but then I didn’t.
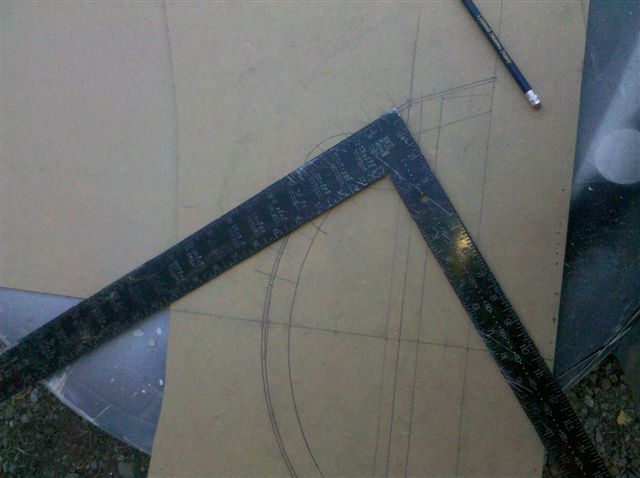 Then I marked around the radius at one inch increments starting one half inch from the edge. This represents the center lines of the individual conic sections. I then took the framing square and lined up one side from the center point to each of these points and read off the length of the tangent up to the center line. This gives me the radius for the center of each conic section.

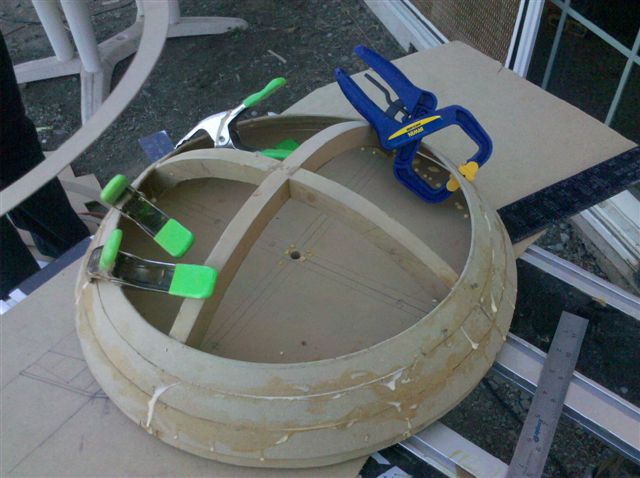
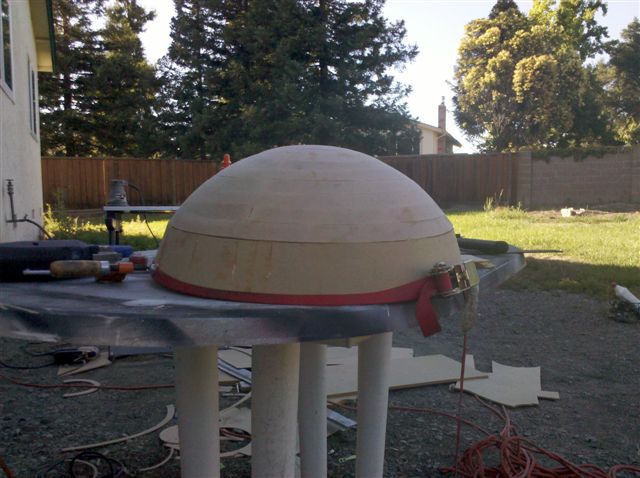
Then I made up rafters for the inside, to fit the inside of the dome, and mortise jointed into the dome base. If I was doing this again I would make up a round piece of 3/4″ MDF for the center, turn the top of the dome on it on the lathe, and mortise the four legs into it. This time one of the butt joints came loose and finishing the top of the dome was a pain (see later). Also the supports for the eyestalk should be built in at this stage. I didn’t think of it at the time and regretted it later.
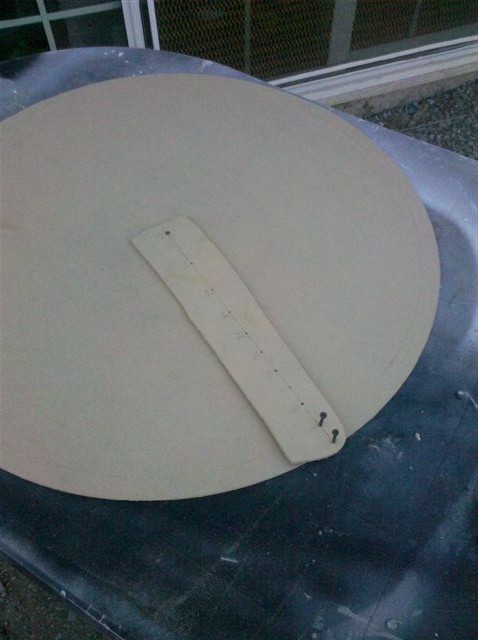
Then I started cutting my conic sections out of 1/8″ MDF using the usual method. In this case I predrilled all my centre holes at the measurements take earlier, and placed the drywall screws one half inch either side of the zero. Hard scribe on both sides then once each side with the Stanley knife and the hoops pop out.
 Break/cut each hoop and pull it in to about the right diameter then warm with the heat gun to help it set there. It is very hard to get these to stay in the right place without some toasting. Once persuaded to the right shape it is easy to nail gun, glue and trim with pull-saw.
 In retrospect I should have done the base first (see later) as it would have given a more solid base to work from.
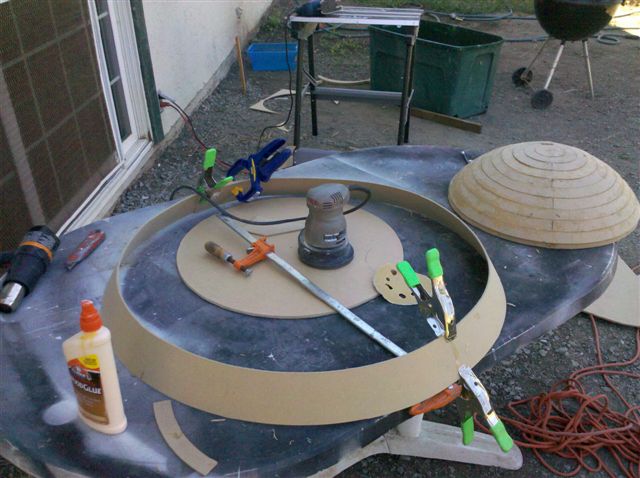
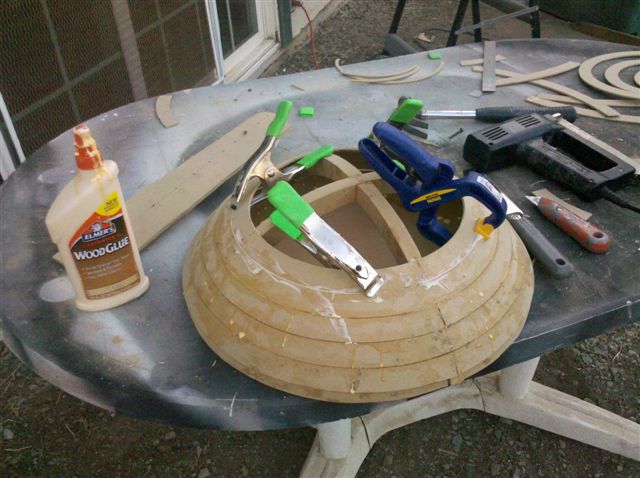 Work your way up, clamping at each level and waiting enough time for the glue to set.
The last, smallest ones were the hardest to get to lay down, so perhaps a solid turned center would have been better. Wonderful stuff, bondo :-)
 That was day one.
Day 2 was the base (which I should have done first).
 The outer radius for the section was calculated from the plans – it is a 3:1 gradient, with a 10″ radius, so the height would be 30″, so the hypotenuse through Pythagoras is the square root of 1000 – and the inner is nine-tenths of that. This needed another 4′ sheet of MDF to make two more-than-half circumferences, so I needed to join them together.
 I did one joint at a time, backing them with some spare MDF….
 and squishing it in with a big clamp to make it flat at the join for the second.
 This distorts the flatness in a worrying way, but it works out when it is un-squished. Lots of heat gun use is needed to get this to bend. Take it easy or the MDF will crack.
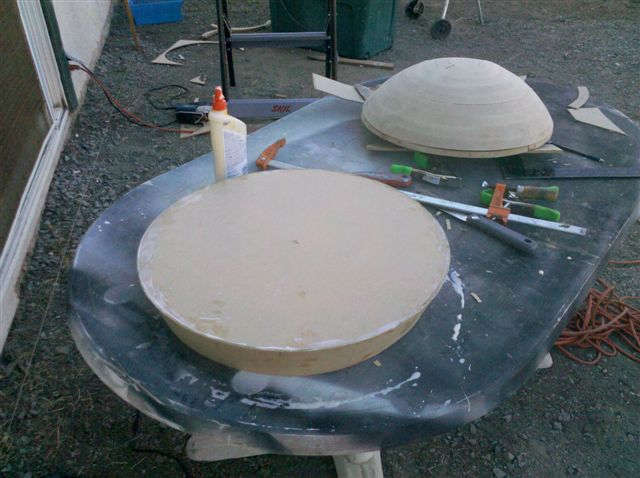 Once that is set up, I glued it to a base disk. This gets mostly cut away at the end.
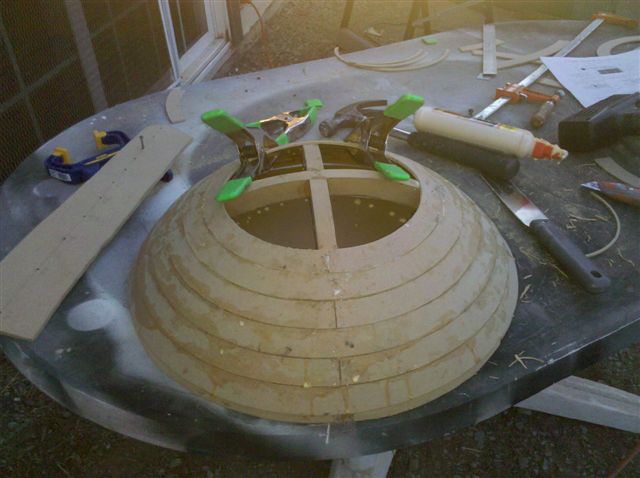
 Then attach it to the top of the dome. This would have been much easier if I had not made the top of the dome first – I could have just dropped the base of the top of the dome in through the wide end of the base before putting the base of the base on. (hope that makes sense)
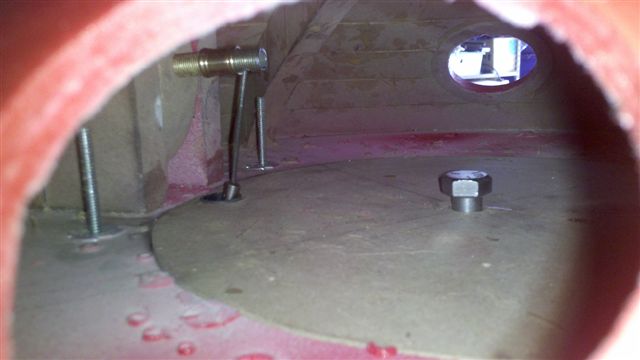
After the glue set up I cut the base disk out again so it fits over the neck bin. It just cleared the top of the neck struts after need some tweaking.
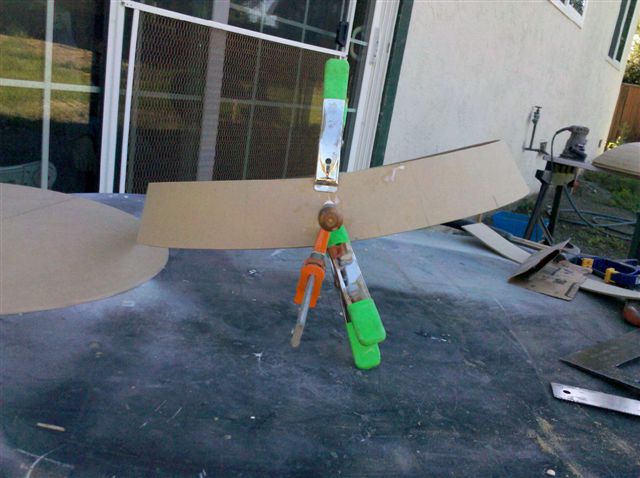
 Mounting the eyestalk involved retrofitting the supports – that should have been done at the rafters stage. It pivots on short bits of lamp rod that are screwed in with the very tips of my fingers.
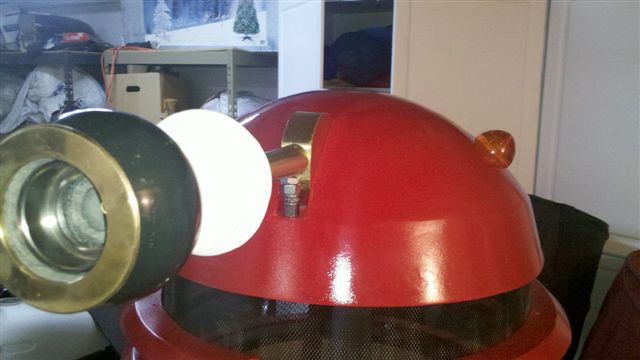
 I chose to push my Mini indicator lenses through holes cut from the inside. Lenses are cheap – whole indicator assemblies are expensive. I drilled pilot holes and bolted and glued in small MDF disks before applying the hole saw. This strengthens around the hole. The cable for the eyestalk control is an Ariel girder fork front brake cable that is about 2″ too short for my forks/handlebars on the VB.
Not bad for $12 of new MDF plus scrap!


4 Responses
How much would you charge to make me one of these? lol I tried it myself and well.. let’s just say I shouldn’t be allowed near the heat gun ever again.
Always use heat and flammable materials outdoors and keep an extinguisher handy! Seriously though, Dalek domes are copyright so nobody is allowed to sell them, and the joy of Dalek building is in the building. MDF is cheap, try again. Ping me if you need any hints or tips.
Hello , I’m in the same boat as you are I am at the stage of making my dalek head ,,,, it has taken me 8 months to build the dalek body from may to December 2014 ,, ,,,now i am at the final stage this year 2015 i. Have the plaster cast of the dome but do not know how to fiberglass hmm. Please can you help me out
Well, I can’t help you with fiberglass, as I don’t know how to do that either. If you haven’t done so already, join the forum at Project Dalek and ask there. There are many build diaries there and helpful folk to provide tips. There are probably a lot of Youtube videos of “how to fiberglass” too.
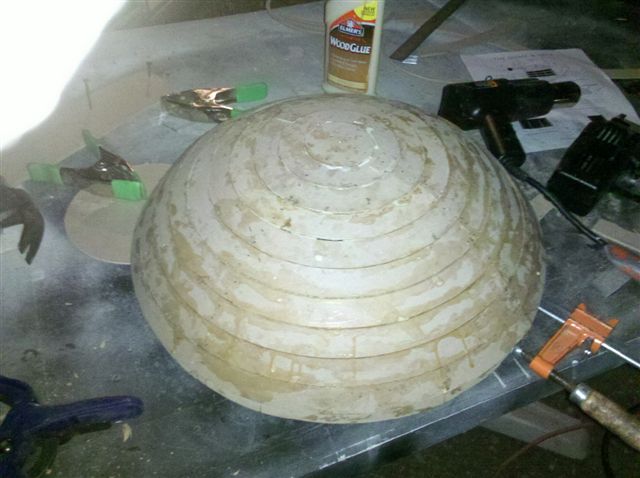
The construction of my MDF dome took 2 days, followed by another weekend of sanding and painting, and cost about $12. It does help if you have the tools already (electric nail gun, heat gun). It is definitely not as robust as fiberglass – it probably would not survive a deliberate punch, but it’s survived 3 years so far.
Good luck!