I’m building an SMD reflow oven from an abandoned toaster oven I found in my garage. In my last post I described my adventures and innovations with sheet metal, ceramic insulation and Reflect-A-Gold tape. I think I did a good job with that.
Most of this post is about the electrics and electronics and Fun With Thermocouples. Some of this I stand by, and some of it is “don’t do what I did”. The major part of the latter was building my own controller hardware from generic Chinese parts. While it does work, and it did save a few dollars, the result is far less tidy and somewhat less functional than the Contrleo2 it is based on.
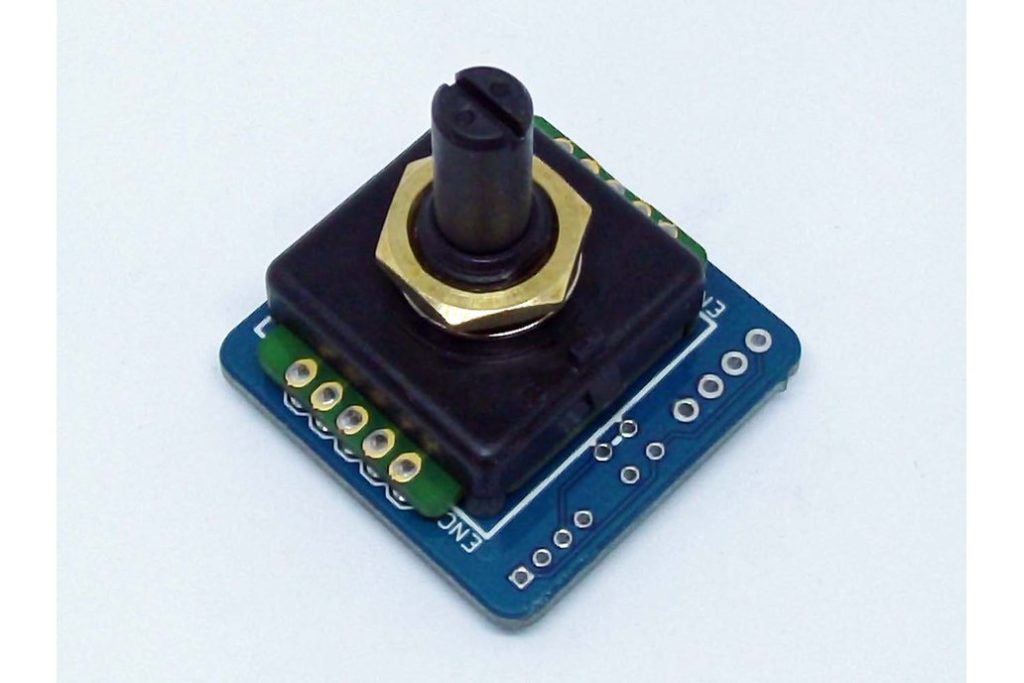
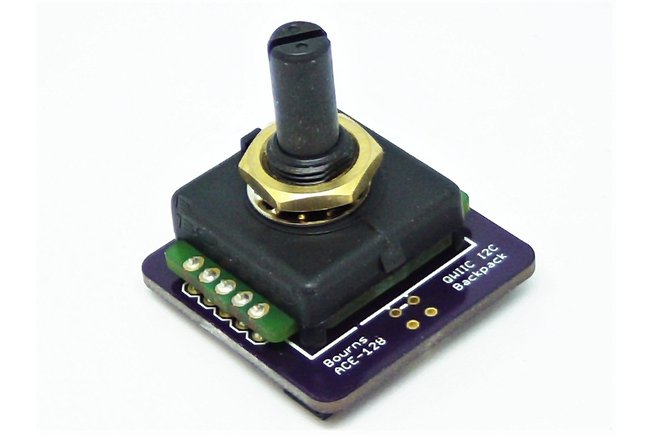
I chose to use a 1602 LCD display with I2C backpack – because I like I2C and the backpack includes the contrast pot. This meant swapping the controleo2 display library with the NewLiquidCrystal library which eats a little bit more memory. Just enough that it won’t compile for the Nano.
On the bright side the buzzer from my parts bin did not do tones, so I stripped down that code to output beep patterns.
Now it compiled but crashed a lot. So I stripped out all the bake code. Now it works!
Even the original code ate all the memory, so either it needs some tidying or really wants a bigger Atmega chip.
Then I mis-wired the MAX31855 module and let the magic smoke out of the 3v3 regulator on it AND the 5V regulator on the Nano. Luckily the Nanos are cheap and the Nano shield has a 3v3 regulator.
I quite like the aluminum enclosure I put the display and controls in though the buttons don’t line up with the display prompts which leads to operator confusion and factory resets. For once I failed to misalign any of the holes so it looks pretty good. It should also provide a solid mount for the door servo.
So unless you are a masochist who just like building things from scratch for the fun of it, I recommend buying the Controleo2. Don’t build your own, it’s not worth it.
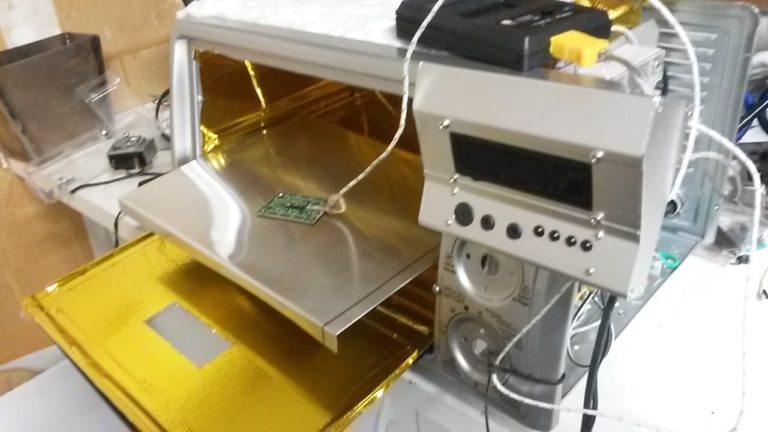
The mounting plate for the electronics is cut from a Chatsworth datacenter rack mount keyboard tray I found in the trash. I was able to salvage the mounting screws, spacers and rivet-nuts, so it stands above the vent louvres in the oven base. I’m trying to keep the electronics compartment as cool as possible. I’ll probably add a fan where the middle oven control was to blow air directly onto the Nano.

On the mains AC side I replaced the original short and somewhat puny looking cable with a new 14G cable from the hardware store with a new stress relief clamp. I’m keeping the high voltage and low voltage separate – I’ll keep the wall-wart outside the case, maybe add a panel mount socket for it. I have ordered a panel mount USB B socket for Nano programming – I may just power via that using a USB power supply. I will wait till the servo arrives to finalize that as it will be a heavy draw.
I made my baking tray from thin aluminum flashing using my little Harbor Freight bending brake. It is folded back 0.5″ on each side, and double folded 0.5″ at the back and 0.5″ behind the lip at the front. It has enough rigidity as long as it is not abused, and there is enough flashing left on the roll to make a dozen more.

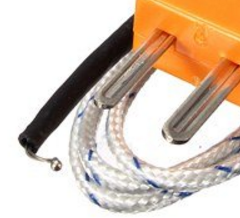
Thermocouples come in different flavors. I originally went with the shiny thick silver kind with the nuts to mount it on the oven wall. Wrong! Most of this is casing, not thermocouple, and all that extra metal makes it slow to react to temperature changes. I also bought a cheap meter and thermocouple and the built-in thermocouple lagged up to 90 seconds behind the meter’s “wire end” thermocouple. So I swapped them for now, running the little thermocouple in the corner of the door. More thermocouples are on order.
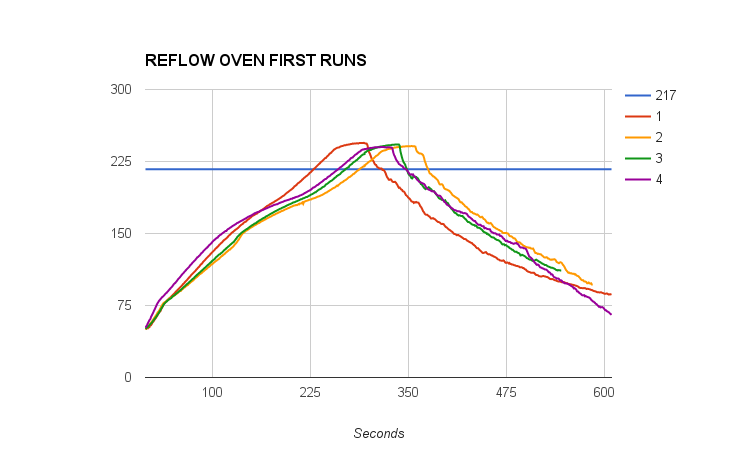
With all that done, the darned thing works! I set the max temp for 235C for the 217C melting point lead free solder from MG Chemicals. After a couple of test runs with capacitors on scrap boards, I cooked up a real one. I may have skimped on the flux-paste warming as it was hard to get it to stick to the board, but they are right when they say that you don’t have to be too picky about paste placement.

Here’s the temperature profiles from the first 4 runs. The first run is a little different as I had the thermocouple suspended from the bad thermocouple. After the first run I relocated the thermocouple to a scrap board actually on the tray. The software made some minor adjustments for the second and third runs also, but continued the cycle.